Capturing a unique Victoria Harbour sunset isn’t about finding a secret spot, but mastering a professional’s workflow of timing and technique.
- Prioritise atmospheric clarity over location by checking the AQI and shooting after rain.
- Use a dual-perspective strategy (Kowloon then HK Island) to shoot both golden and blue hours in one evening.
Recommendation: Adopt the ‘multiple crossing’ Star Ferry technique, riding back and forth during the 45-minute sunset window for a dynamic portfolio of the evolving light.
You’ve flown halfway across the world, camera gear carefully packed, dreaming of that iconic Hong Kong skyline shot. You arrive at the Tsim Sha Tsui promenade as the sun begins to dip, only to be met by a wall of selfie sticks and a thousand other smartphone screens. The shot you get is the same one everyone else is getting. Many guides will point you to the obvious spots—the promenade, the Peak—but they fail to address the real challenge for a serious photographer: how to create something unique amidst the chaos.
As a photographer who has spent years chasing the light across this harbour, I can tell you the secret isn’t in a magical, unknown location. The art lies in the process. It’s about understanding the city’s unique atmospheric challenges, mastering a temporal strategy that milks every last drop of colour from the sky, and knowing the subtle technical tricks that transform a crowded tourist spot into your private studio. It’s about seeing the harbour not as a static backdrop, but as a dynamic stage where the light performs a new show every evening.
But what if the key wasn’t finding a new spot, but using the classic spots in a new way? This guide moves beyond the generic advice. We will deconstruct the professional’s workflow, breaking down how to manage Hong Kong’s infamous haze, which boat offers the best angles, where to find elevated views hidden in plain sight, and precisely when to set up your tripod to capture the full evolution of light—from the first warm glow of golden hour to the final, deep cobalt of blue hour.
This guide provides a structured approach to capturing Victoria Harbour, ensuring you leave with a portfolio of images that truly stand out. Below is a summary of the key strategies we will explore to help you master this iconic view.
Summary: A Strategic Guide to Photographing Victoria Harbour
- Why Do 40% of Tourists Fail to Get Clear Harbor Photos in Spring?
- Star Ferry or Aqua Luna: Which Boat Tour Offers Better Night Photography?
- How to Access the Secret Parking Rooftop for Panoramic Harbor Views?
- Is the Harbor View Better from Kowloon Side or Hong Kong Island Side?
- When Is the Best Time to Ride the Star Ferry for Sunset Photos?
- When to Set Up Your Tripod to Catch the Symphony of Lights Perfectly?
- Which Side of the Tram Should You Sit on for the Best Harbor Views?
- Where Can You Get Peak-Level Views Without Paying for the Sky Terrace?
Why Do 40% of Tourists Fail to Get Clear Harbor Photos in Spring?
The number one enemy of a great Hong Kong skyline photo isn’t crowds; it’s the atmosphere. Especially during spring, a thick maritime haze can descend, obscuring the iconic buildings and washing out colours. This isn’t just a feeling; the data is stark, with one study on long-term air quality showing that days with visibility below 8 km increased from just 6.6 to over 54 in the span of four decades. This combination of humidity and airborne particulates diffuses light, reduces contrast, and can ruin a shot before you’ve even pressed the shutter.
A professional doesn’t fight the haze; they manage it. The first step is acknowledging its presence and using tools to mitigate its effects. The most powerful tool in your bag for this is a circular polarizing filter (CPL). By rotating the filter, you can cut through a significant amount of the non-metallic reflections in the atmosphere, deepening the blue of the sky, enhancing cloud definition, and saturating the colours on the building facades. It’s the single most effective piece of gear for adding punch and clarity on a hazy day.
Beyond gear, a strategic approach to timing and planning is crucial. Instead of leaving it to chance, treat visibility as a key planning metric. Before you even leave your hotel, a quick check of real-time conditions can save you a wasted trip and help you decide on the best course of action for that day’s shoot. This proactive mindset separates a lucky snapshot from a planned, professional photograph.
Pre-Shoot Visibility Checklist for Hong Kong
- Check the real-time Air Quality Index (AQI) on AQICN.org or the EPD’s portal; aim for an AQI below 50 for optimal clarity.
- Monitor live webcams of Victoria Harbour to assess actual visibility and haze levels in real-time before committing to a location.
- Schedule shoots immediately after rain showers, when atmospheric particulates have been washed away and the air is at its cleanest.
- Use weather apps to check humidity; avoid days with relative humidity above 80%, which significantly amplifies maritime haze.
- Arrive at your location 90 minutes before sunset to assess conditions and adjust your shooting position if visibility is compromised.
Star Ferry or Aqua Luna: Which Boat Tour Offers Better Night Photography?
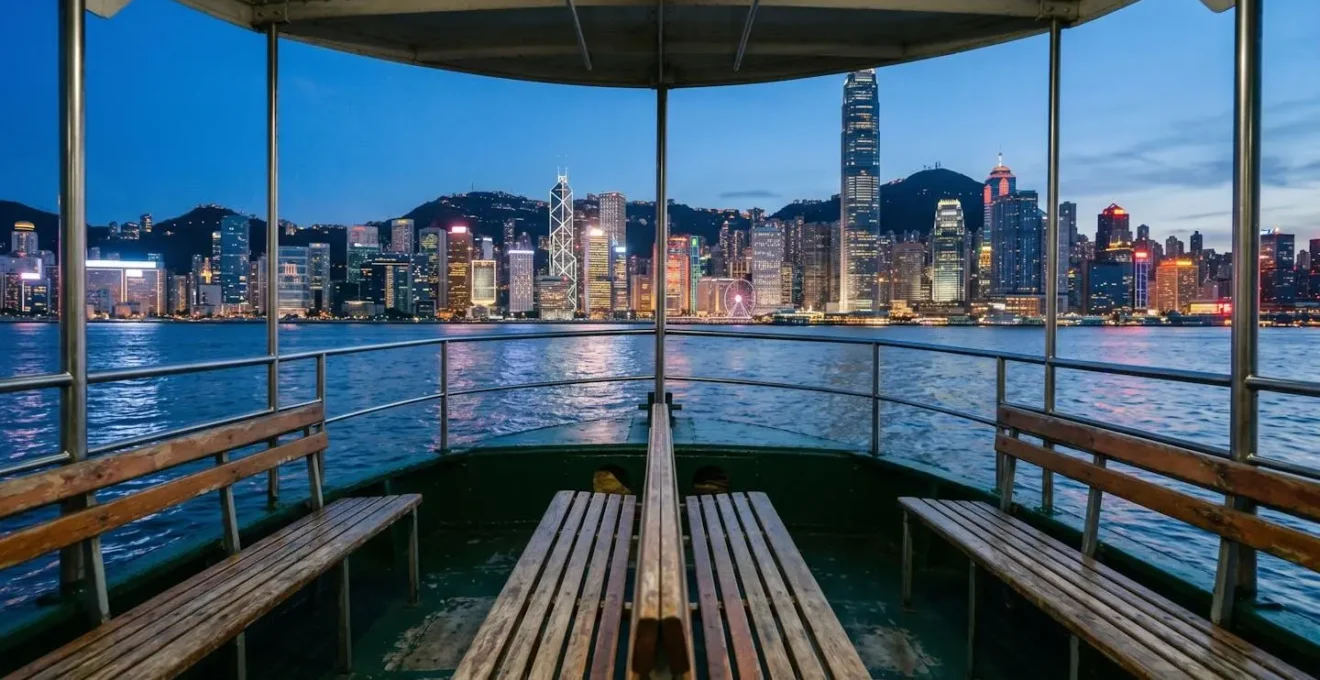
Getting out on the water provides a dynamic perspective that land-based shots can’t match. The two most popular options, the historic Star Ferry and the chic Aqua Luna junk boat, offer vastly different photographic experiences. The choice between them depends entirely on the story you want to tell. As one local expert puts it, the journey itself is the destination.
The Star Ferry isn’t just transport. It is one of the great short journeys in Asia, and every crossing is a different photograph.
– Travel photographer and Hong Kong guide, Chasing Hippoz Photography & Travel Guide to Hong Kong
The Star Ferry is for the photojournalist. It’s gritty, authentic, and gets you down at water level. The lower, open-air deck offers incredible opportunities for close-up, environmental portraits of the crew, the weathered teak benches, and the churn of the water, all with the skyline as a backdrop. It demands a fast lens (like a 50mm f/1.8) and a steady hand, but the results are full of character. It’s about capturing the soul of the harbour.
The Aqua Luna is for the landscape purist. Its elevated upper deck provides a clean, unobstructed panoramic vantage point, lifting you above the water spray and other boat traffic. The 45-minute circular route is specifically designed for sightseeing, giving you ample time to compose wide-angle shots of both the Hong Kong Island and Kowloon skylines. It’s a more stable and controlled environment, ideal for capturing pristine, sweeping vistas with a 16-35mm lens. This is about capturing the grandeur of the harbour.
Ultimately, the « better » boat is the one that aligns with your photographic style and objective. For a detailed breakdown of the technical considerations, the following comparison is invaluable for making an informed decision before you buy a ticket.
| Criteria | Star Ferry | Aqua Luna |
|---|---|---|
| Photography Purpose | Gritty, authentic close-up shots of harbor life and ferry operations | Elevated, clean wide-angle shots of full skyline with social atmosphere |
| Deck Configuration | Lower open-air deck provides water-level perspective, proximity to stevedores and authentic activity | Upper deck offers elevated vantage point, cleaner backgrounds, less spray risk |
| Route & Angles | TST-Central (8 min) or TST-Wan Chai routes offer different skyline angles; frequent crossings allow multiple attempts | 45-minute circular route captures both Hong Kong Island and Kowloon sides from unique mid-harbor positions |
| Stability for Handheld | Moderate movement; requires bracing against railings, ISO 1600-3200, shutter 1/60-1/125s | Slightly more stable with higher vantage; ISO 1600-2500, shutter 1/80-1/160s recommended |
| Crowd Factor | Very crowded on upper deck evenings; lower deck less tourist-heavy | Controlled capacity (max 80 passengers), more space but requires advance booking |
| Cost | ~HK$3-4 per crossing (extremely affordable for multiple attempts) | ~HK$200-350 per person (premium experience with drinks and guide) |
| Best Lens | Fast prime 35mm or 50mm f/1.8 for low-light versatility and close-range storytelling | Wide-angle 16-35mm f/2.8 for skyline panoramas; 24-70mm f/2.8 for flexibility |
How to Access the Secret Parking Rooftop for Panoramic Harbor Views?
While the TST promenade offers the classic ground-level view, it’s often shoulder-to-shoulder with tourists. The professional’s secret is to gain elevation. One of the best-kept secrets for a panoramic, crowd-free vantage point is a public space hidden in plain sight: the Ocean Terminal Deck at Harbour City. It’s not a bar or a restaurant, but a free, open-air rooftop observatory that many tourists and even locals don’t know how to find.
Case Study: Ocean Terminal Deck – The Hidden Photographer’s Vantage Point
The Ocean Terminal Deck, built in 2017, offers a stunning 270-degree panorama of Victoria Harbour from an elevated position above the chaotic TST Promenade. According to a Hong Kong-based private tour guide with over 50 years of experience, its entrance is deliberately hard to find, requiring a walk through the entire length of the Harbour City mall. This design keeps it remarkably quiet, even during the golden hour. Photographers who make the journey are rewarded with clean sightlines to the Hong Kong Island skyline and ample empty railing space, a luxury unheard of on the promenades below during sunset.
The value of this location lies in its unique perspective. Being five stories up provides just enough elevation to separate your shot from the foreground clutter of the waterfront, allowing for cleaner compositions. It’s an ideal spot for wide-angle panoramas and long-exposure shots of the harbour traffic after sunset. The « mission » to find it is part of the appeal, a small puzzle that rewards you with one of the city’s most serene and spectacular views.
To ensure you find this hidden gem, follow these instructions precisely. Think of it as a photographic treasure hunt.
- MTR Exit: Take Tsim Sha Tsui Station Exit A1 and walk south towards the Star Ferry Pier.
- Building Entry: Enter the Harbour City shopping mall at the Ocean Terminal section, which is the part closest to the water and the ferry terminal.
- Navigation: Walk the entire length of the ground floor corridor towards the western end of Ocean Terminal. Follow the small signs for ‘Ocean Terminal Deck’ or ‘Rooftop Garden’.
- Ascent: Take the escalators up to Level 3, then locate the final set of escalators that lead directly to the rooftop observatory deck.
- Timing: Arrive at least 90 minutes before sunset to claim a prime spot at the railing, especially on a clear day. The deck is free and typically open from 10am to 10pm.
Is the Harbor View Better from Kowloon Side or Hong Kong Island Side?
Amateur photographers often ask which side of the harbour is « better. » The professional’s answer is: « Both, but at different times. » The key to a truly comprehensive portfolio is not to choose one side over the other, but to execute a dual-perspective strategy that captures the best light from each vantage point within the same evening. This requires planning, swift movement, and an understanding of how the light interacts with each skyline.
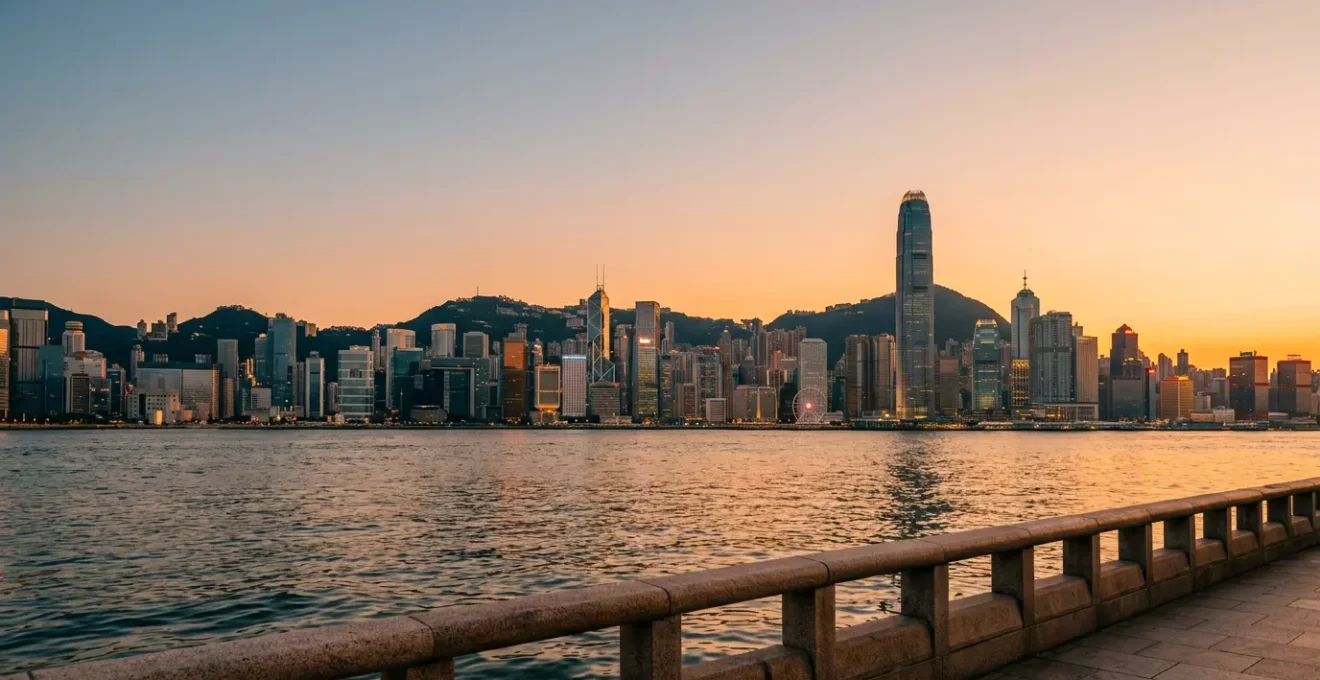
The classic view is from the Kowloon side (Tsim Sha Tsui) looking towards Hong Kong Island. This is your go-to for the golden hour. As the sun sets in the west (behind Hong Kong Island), it backlights the iconic skyline, creating dramatic silhouettes and casting a warm, golden glow on the building facades. This is where you capture the quintessential postcard shot.
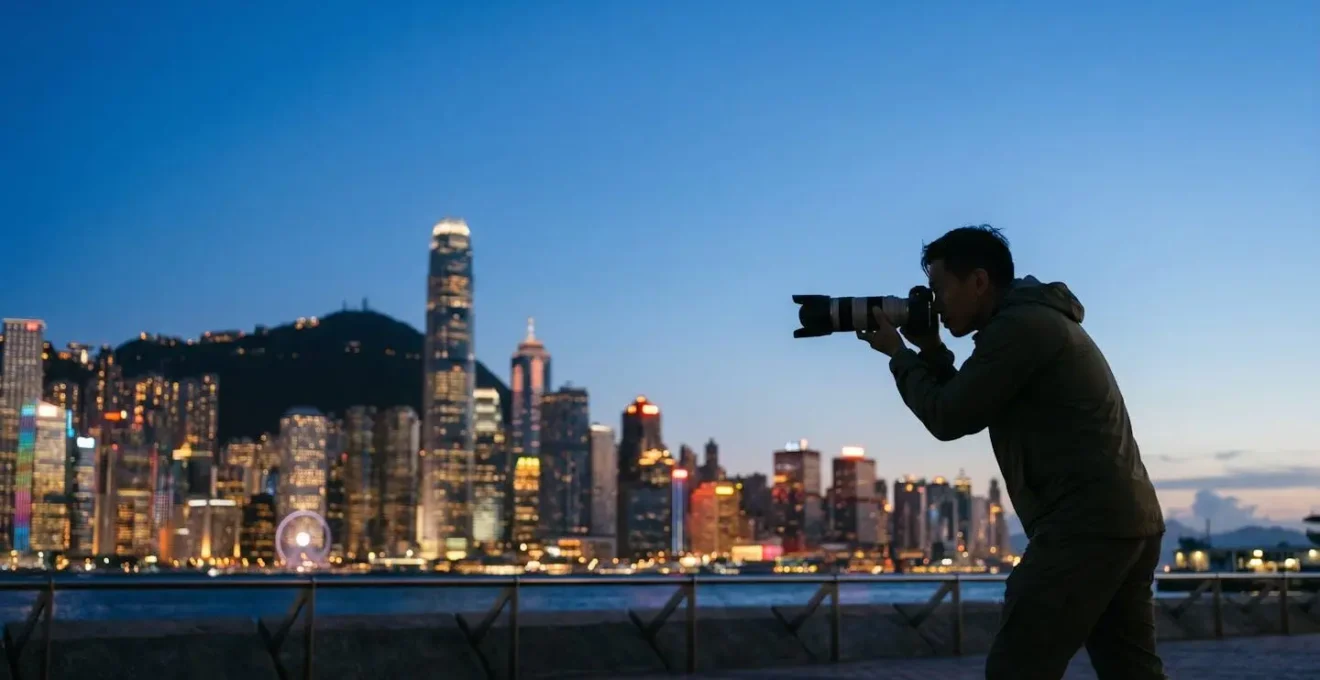
However, once the sun has set, the real magic begins on the Hong Kong Island side (Central or Tamar Park). During the blue hour—that brief, 20-30 minute window after sunset—the sky turns a deep, saturated cobalt. From this perspective, you are now looking at the Kowloon skyline, which is fully illuminated against this rich blue backdrop. This view, featuring the towering ICC building, is less photographed but equally stunning. It’s also the superior vantage point for using a telephoto lens to compress the Kowloon skyline, creating a powerful, layered composition of dense urban light.
Executing this strategy is a race against the fading light, but it’s a well-defined workflow that yields two completely different, high-impact images in under two hours.
- Phase 1 (Golden Hour, 6:15-7:30 PM): Set up on the Kowloon side (TST Promenade or Ocean Terminal Deck). Capture the sun setting behind the HK Island skyline.
- Phase 2 (The Move, 7:30 PM): As blue hour begins, immediately board the Star Ferry from TST to Central. The 8-minute crossing is your transition time.
- Phase 3 (Blue Hour, 7:40-8:00 PM): Arrive at the Central Waterfront or Tamar Park on Hong Kong Island. Set up to shoot the now-illuminated Kowloon skyline against the deep blue twilight.
- Phase 4 (Telephoto Compression, 8:00 PM onwards): Use this position to photograph the Symphony of Lights, using a 70-200mm lens to isolate details and create compressed, abstract images of the light show.
When Is the Best Time to Ride the Star Ferry for Sunset Photos?
For photographers who choose the authenticity of the Star Ferry, the question of timing is paramount. A single 8-minute crossing offers a fleeting glimpse, but the true potential of this moving vantage point is unlocked with a more deliberate strategy. Pros don’t just take one ride; they employ the « multiple crossing technique » to document the entire evolution of light during the 45-minute window around sunset.
Case Study: The Multiple Crossing Technique for Golden Hour
Instead of one ride, serious photographers purchase 3-4 tokens and ride the ferry back and forth between TST and Central. Each crossing captures the skyline from a slightly different mid-harbour angle and under progressively changing light. A ride at 6:15 PM might capture warm sidelight. The return trip at 6:30 PM hits the peak golden hour. A third crossing at 6:50 PM captures the skyline as the first city lights turn on against the deepening sky. An optional fourth « afterglow » ride around 7:10 PM captures the deep, saturated colours that appear 15-20 minutes after sunset—a moment most people miss. This method, as detailed by local photo guides, generates a rich, diverse series of images documenting the complete light transformation for less than the price of a coffee.
The absolute sweet spot, if you only have time for one or two crossings, is the period starting 15 minutes before sunset and ending 20 minutes after. This window covers the transition from the warm, direct light of the golden hour to the cool, ambient light of the blue hour, where the sky and the city lights are perfectly balanced. The journey from TST to Central is generally preferred for the sunset phase, as it provides a direct view of the sun dipping behind the Hong Kong Island skyline.
For this technique, preparation is key. Use a fast shutter speed (1/125s or higher) to counteract the boat’s movement, open up your aperture (f/1.8 to f/4), and don’t be afraid to increase your ISO (800-3200) as the light fades. Brace yourself against a railing or pillar for stability and shoot in continuous burst mode to maximize your chances of getting a perfectly sharp shot between the waves.
When to Set Up Your Tripod to Catch the Symphony of Lights Perfectly?
The Symphony of Lights, which bathes the harbour in colour every night at 8 PM, is more than just a tourist attraction; it’s the world’s largest permanent light and sound show, involving 39 buildings as of 2022. For a photographer, it’s a technical challenge that requires precise timing and settings to capture effectively. The biggest mistake amateurs make is thinking the show itself is the only thing to photograph. In reality, the 90 minutes leading up to the show are just as, if not more, important.
The key is to treat the 8 PM show as the grand finale of a longer photographic session that begins during golden hour. You need to arrive and claim your tripod spot on the TST Promenade or Ocean Terminal Deck by 6:00-6:30 PM at the latest. This gives you time to capture the entire light evolution: the warm glow of the golden hour, the dramatic colours of the sunset itself, and the magical balance of the blue hour when the sky and city lights are in perfect harmony.
When the show begins at 8:00 PM sharp, another common mistake is to use a very long exposure (15-30 seconds). This will turn the dynamic laser beams into a blurry, indistinct green-and-white mess. To capture the lasers as crisp, defined streaks of light, you need a much faster shutter speed. The professional approach is to use shutter speeds between 1 and 4 seconds. This is long enough to register the beams as lines of light but short enough to keep them sharp and distinct. You will need to bracket your exposures, adjusting your ISO (from 400 to 1000) and aperture (f/8 to f/11) to find the right balance between the bright building lights and the dark sky.
Professional’s Timeline: Capturing the Full Light Evolution
- 6:00 PM: Arrive at TST Promenade or Ocean Terminal Deck to claim a prime tripod position.
- 6:15-6:45 PM (Golden Hour): Shoot the warm light on the HK Island facades (f/8-f/11, ISO 100).
- 6:45-7:15 PM (Sunset): Capture the sun descending behind the skyline, bracketing exposures.
- 7:15-7:50 PM (Blue Hour): This is the sweet spot. Shoot the deep blue sky against the city lights (f/8, ISO 400-800, 1-4s shutter).
- 8:00-8:13 PM (Symphony of Lights): Use faster shutter speeds (1-2 seconds) to capture lasers as defined streaks, not blobs. Bracket extensively.
- 8:13 PM onwards (Post-Show): Now switch to longer exposures (15-30 seconds) to capture light trails from boats on the harbour.
Which Side of the Tram Should You Sit on for the Best Harbor Views?
The Peak Tram is an iconic journey, but for a photographer, it can be a frustrating experience with reflections, movement, and crowds. However, with the right strategy, it can yield unique photographs. The most crucial decision is where to sit. On the ascent, you must secure a seat on the right-hand side of the tram (when facing uphill). As the tram climbs, the trees will part periodically to reveal stunning, ever-changing perspectives of the skyline that are impossible to get anywhere else.
Conversely, on the descent, the best view is from the left-hand side. A pro tip is to take the return journey shortly after the main sunset rush (around 8:15-8:45 PM), as it’s often less crowded, giving you a better chance to secure this prime spot. But getting the seat is only half the battle; shooting effectively from a moving, vibrating vehicle through glass requires a specific set of techniques.
The top deck’s front-left seat offers a longer, more varied, and arguably better view of the harbor and south side of the island for a fraction of the price and with fewer crowds.
– Hong Kong travel photography guide, Victoria Harbour Photography Guide 2025
Forget slow shutter speeds. Your goal here is to freeze motion. This means pushing your camera’s settings to their limits. A fast shutter speed is non-negotiable, and managing reflections is your primary technical challenge. By adopting these techniques, you can turn a bumpy tourist ride into a productive photo opportunity.
- Eliminate Reflections: Press your lens flat against the window glass. Use a rubber lens hood or cup your hand around the lens to create a light-tight seal, blocking internal reflections from the tram’s cabin.
- Fast Shutter Speed: Set your shutter to a minimum of 1/500s (1/1000s is ideal). This is essential to freeze the motion of the tram and compensate for vibrations.
- Use Burst Mode: Shoot in continuous high-speed mode. Firing off 5-10 frames at a time dramatically increases your odds of capturing one perfectly sharp image between the bumps and jolts.
- Increase ISO Aggressively: Don’t be afraid to push your ISO to 1600, 3200, or even higher. The noise from a high ISO is far easier to correct in post-processing than motion blur.
- Control Your Metering: Use spot or center-weighted metering focused on the skyline outside. This prevents your camera’s meter from being fooled by bright reflections on the window or the dark interior of the tram.
Key Takeaways
- Timing is more critical than location: Master the transition from golden hour to blue hour for the most dramatic light.
- Atmospheric haze is a variable to be actively managed with tools like polarizing filters and strategic timing, such as shooting immediately after rainfall.
- The best and most unique views often require a simple, well-timed strategy (like the multiple ferry crossing) rather than an expensive ticket.
Where Can You Get Peak-Level Views Without Paying for the Sky Terrace?
Reaching The Peak is a rite of passage, but many photographers are disappointed by the Sky Terrace 428. It’s expensive, incredibly crowded, and forces everyone into the same few compositional corners. The professional secret is that the best views from The Peak are entirely free; you just need to know where to walk. The premier alternative is the Lugard Road Lookout, a scenic walking path that offers superior angles with a fraction of the crowds.
Case Study: Lugard Road, The Professional’s Alternative to Sky Terrace
Acclaimed photographers identify Lugard Road as offering ‘the best vantage point’ for Hong Kong skyline photography, easily surpassing the paid Sky Terrace. This free, 3.5km circular path provides multiple viewpoints that allow for creative compositions using foreground elements like weathered stone balustrades and overhanging trees to add depth. Experienced shooters seek out a specific elevated rock formation along the trail, allowing them to gain height over other visitors for a completely unobstructed view. Crucially, while sunset can be popular, a sunrise walk on Lugard Road is almost completely deserted, offering soft morning light on the city in serene solitude.
The journey along Lugard Road is a photo walk in itself. A short 15-20 minute stroll from the Peak Tower will bring you to the main lookout points, which offer a classic, sweeping vista of the harbour from above. For those willing to explore, the entire loop provides constantly evolving perspectives. Two other excellent free alternatives are the Lion’s Pavilion (just a minute’s walk from the Peak Tower) and the rooftop terrace of the adjacent Peak Galleria shopping mall, which offers surprisingly good angles if you know how to find the unmarked access escalators.
By swapping the ticket queue for a short walk, you not only save money but also gain creative freedom. This simple itinerary can guide you to the best free spots.
- Stop 1 (Lion’s Pavilion): Exit the Peak Tower and turn left. This classic free viewpoint is 20 meters away. Arrive before sunrise for empty conditions.
- Stop 2 (Lugard Road Entry): Walk past the Lion’s Pavilion and start counter-clockwise on Lugard Road. The first section offers great shots of the Peak Tram with the harbour in the background.
- Stop 3 (Main Lookout): After a 15-minute walk, you’ll reach the main clearing with its iconic, unobstructed view. This is where most people stop.
- Stop 4 (Advanced View): Continue further to find the elevated rock ledges. Climb carefully for a unique perspective that 99% of visitors will never see.
- Stop 5 (Alternative): For a quick, elevated view without the walk, find the escalators inside the Peak Galleria and head to the free rooftop terrace.
Now that you have the professional’s playbook—from managing haze to executing timed, multi-location strategies—the final step is to get out there. Leave the crowds behind, trust the process, and start documenting your own unique vision of the harbour’s spectacular light.